Migrate Your WordPress to Turnkey-WordPress

So, today I had decided to try out TurnKey linux to run my wordpress instead of the traditional ubuntu + all the manual components to a simple, out of the box solution that could be run as a virtual machine with a readily prepped linux environment.

Getting the machine going is a breeze, a quick tutorial may be found here:

About 5 minutes – pretty straight forward to setup.

Seeing this blogpost is going to be hindsight for me and informative for you, I would also recommend using VMWare Workstation for the snapshots, I took one once I had a clean VM with all the patches and such.

If you have only been needing a clean install, you can stop reading here but if your are upgrading, the following steps will save you a bit of googling.

First of all you will need to export your original posts which can be found from your tools > export of your original worpress.org site.

Next up, we will assume you have already gotten your site up and running if you followed the guide above because you will need to re-import it into your new site. This you will do after logging into your new wp-admin. Below are a few considerations which should be tackled in the following order:

  1. Login – and create yourself a new user – this user will be used to take ownership of your posts in your NEW blog.
  2. When importing, WP will ask you to download a the WordPress importer; do it!
  3. Once imported you will need to alter your wp-config.php, please also note the location and how I modified it.
    Turnkey offers a nice/lazy way of editing your config files. This can be found at https://wp-ip-address:12321 then navigate to your Tools then File manager.
    Modify the following few fields withing the php file. wp-config
  4. Ok, we are halfway there. Now to change two fields into on your database, logon to your php myadmin using https://wp-ip-address:12321, select your wordpress database from your drag-down box. and open your wp_options table. Here you will need to change two fields; home AND site url to incorporate reflect your new site.
    siteurl
  5. Probably the most important issue I have faced is getting the <a href> of the pictures pointing towards the external facing site and not the internal ip address of the server. to address that, a little hunting around gave me the following SQL query I ran on the website instead of doing it manually.
    You can tun the following update by clicking on SQL on your MyPHP:
    UPDATE wp_posts set post_content=REPLACE(post_content, ‘192.168.2.225/’, ‘www.georgeene.com/’)

And – Voila and welcome to your new wordpress block running on next to no resources and is FAST given the apace + debian back-end.

USB over Ethernet for your VMs

In today’s environments, you will be needing a USB over Ethernet solution in order to get rid of your old dying hardware/workstations/servers in order to move everything to your enterprise level hardware – Enter Jaycar’s USB over Ethernet server.

usb 2 server


Assumptions:

  1. Your connecting OS will be Windows 2008 r2.
  2. Your network segmentation will allow for broadcast traffic to where your USB box is sitting.
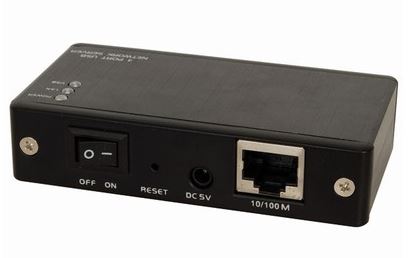
  3. You have purchased a YN8406:
    http://jaycar.co.nz/productView.asp?ID=YN8406&keywords=usb+server&form=KEYWORD

Lets begin, you will need to worry about your drivers, and a few modifications to your VM.

Drivers:

First of all you will find the drivers originally bundled with the unit are no good and will not successfully install. Throw them out.

The following drivers have been tested as working in a production environment. These come from Elite Silicon Technology and as you would expect, from China but they work.

Install these and assuming your USB server is plugged into the power and on the same broadcast range the app will be able to find it. On the other hand, if you will need to change its IP address you will be able to do so from the USB server software you have downloaded and installed above. If need be, as best practice I would still recommend connecting it to an isolated network/cross-over to give it your static IP.


OS Modifications/Considerations:

Application – the USB server software runs as on auto start (not a service) and will conflict if multiple users run the app. Too many instances and it will confuse itself and crash. This would be in the scenario that USER1 tells it that is want port 1 and 2 mounted, while user 2 wants port 1, 3 connected.  So here are my workarounds:

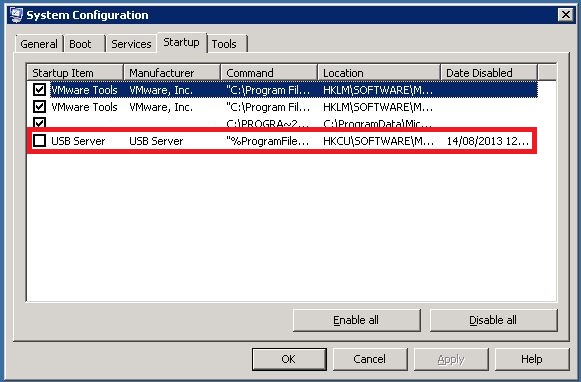
First of all, disable the application from starting up from every Tom, Dick and Harry logging onto your server.

Run your msconfig and disable it from there.

Disable it from starting up

Now, create a service account you will be using to start it up with – nothing special, I did not make mine an administrator:

Service Account

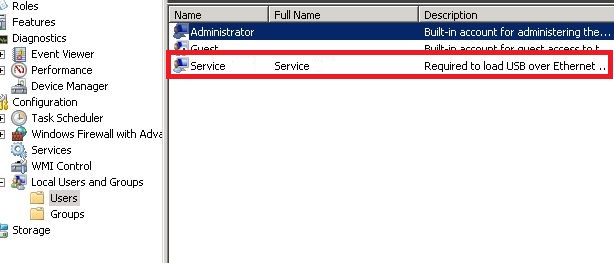
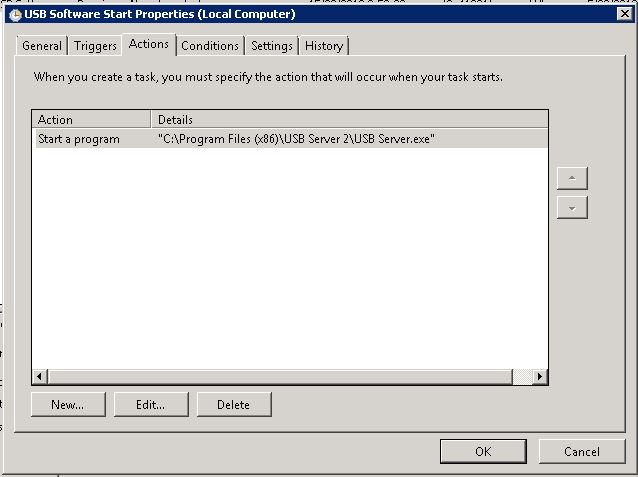
You have now stopped the USB server software from crashing and being a general nuisance. Lets setup the task:

ensure it is run under the new account your have created
at startup run this exe.
this is to be run at startup if your computer USB dongles remounting is to survive a reboot.

To sum up:

  • You have installed drivers that work for Windows 2008 r2.
  • You have disabled multiple instances of the software to ensure it does not crash.
  • You have created a service account.
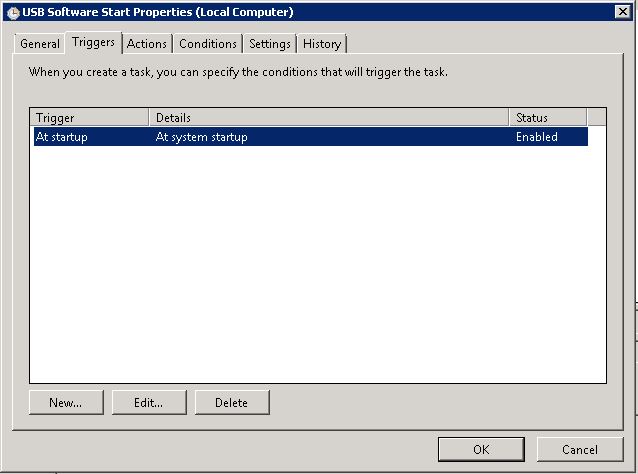
  • You have created a new task to allow it to survive a reboot.

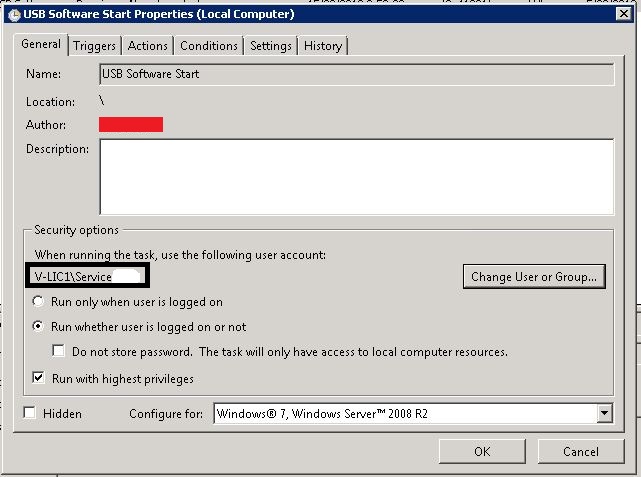
Lastly – and most importantly; RUN THE USB SERVER SOFTWARE AS YOUR SERVICE ACCOUNT – log into your server and it is as the newly created user. The software is pretty dodgy in that you may have different USB dongle mount profiles, do not allow it to to confuse itself. Sadly, given the way the software is written, it will be a “One user, One application” scenario during which you may tell it to auto mount whatever ports you need mounted.

One other aspect this piece of hardware and software answers is that it may be a 1 to many setup (one USB server to many virtual machines).


Backup

A lot of backup suites are available in Windows, but with about half hour of your time, this will provide you with a backup solution.

Try the following just by filling the blanks in the scripts.

I’ve found the following combination to work pretty well. This combination is a D2D, with the possibility of a D2D2T otherwise D2D + Previous versions (Windows 2003 and on-wards).

So, let’s begin – the D2D backup – Robocopy.

Worthwhile mentioning – The below recommendation has been tested in an environment containing about 2Tb of Office docs and other various bits.

First use robocopy, the following script should be used by filling in the blanks – source, destination and whee you want your log file. I found this to take about 30 mins in a production environment.

The log location is going to be pretty important in that we will be firing this puppy to your SMTP server!

Take the following and paste it into a batch file with the above changes and set this up as a scheduled task:

@ECHO OFF
SETLOCAL

SET _source=C:source

SET _dest=\%computername%x$

SET _what=/MIR /COPYALL /B /SEC /A-:H

:: /COPYALL :: COPY ALL file info
:: /B :: copy files in Backup mode.
:: /SEC :: Copy security Descriptors
:: /MIR :: MIRror a directory tree
:: /XD :: Copy except for the following folders
:: /XF :: Exclude file(s) – ie the log file
:: /A :: Set attributes

SET _options=/R:3 /W:5 /LOG:c:sourcemailme.txt /NP /NDL
:: /R:n :: number of Retries
:: /W:n :: Wait time between retries
:: /LOG :: Output log file
:: /NFL :: No file logging
:: /NDL :: No dir logging
:: /NP :: No Progress – does not show progress bar

ROBOCOPY %_source% %_dest% %_what% %_options%

Ok so now you have replication between your source and destination. Great! Lets get some monitoring going.

The following vbs will allow you to send (yourself) and e-mail with the changes – probably worthwhile to dump the following into a vbs and run as a scheduled script, also remember to call it with from a back script with the following “cscript &scriptname&”:

Set objMessage = CreateObject(“CDO.Message”)
objMessage.Subject = “Log to self”
objMessage.From = “me@contoso.com”
objMessage.To = “backuplogs@contoso.com”
objMessage.TextBody = “Haha – you know you love some good spam!”
objMessage.AddAttachment “c:sourcemailme.txt”
objMessage.Send

Ok – so now you are getting a D2D and are also receiving logs – Sleek!

Now that this is going so well, we will probably want to some previous versions of your files using ShadowCopy. The limit to *how much* space you will want to allocate to your previous versions is highly dependent on the *type* of files you will want to recall – ie more space for large files such as videos. There is no right/wrong answer for this.. experiment and see what best fits the environment you are in – if you need to allocate more space to previous versions, so be it, if not, all the better.

The following script will be an easy way to trigger a shadow copy and should be scheduled as a daily job as well.

Grab the script below and dump into a VBS script:

Const VOLUME = “C:”
Const CONTEXT = “ClientAccessible”

strComputer = “.”
Set objWMIService = GetObject(“winmgmts:” _
& “{impersonationLevel=impersonate}!\” & strComputer & “rootcimv2”)

Set objShadowStorage = objWMIService.Get(“Win32_ShadowCopy”)
errResult = objShadowStorage.Create(VOLUME, CONTEXT, strShadowID)

As far as shadow copy goes, I found the following allotment to work well on a 2Tb resulting in a 35 day retention period in an environment with little change – once again dependent to the amount of change in your environment. The screenshot is from Win 2008 R2, valid to 2012 and 2003 environments as well (given tiny gui changes).

backup - Shadowcopy


So, the follow is is now available in your “Previous files” and there is nothing stopping you dumping these files to your tape library – especially if you have a dedicated DAS or Backup NAS/LUN. Should look a little like this after running it for a while:

backup - prev vers

Result?

  1. Free backup using Ms built-in functionality.
  2. D2D Backups – free deduplication.
  3. Monitoring (to email) for this backup.
  4. Quick file restore without the need for tapes (Yes, I acknowledge HDDs don’t grow on trees but youg on also have to realize you are not spending on an Enterprise D2D dedup either piece of software either!)
  5. Possible D2D2T options.

This has server me well since 2003 days, never got the chance to document it.

Worth mentioning that Windows 2008 onwards also support multi-threaded robocopy-ing!

Best of luck for now – Go fourth and backup – maybe restore a little too!

Laxatives

As immature as this may seem, it simply had to be shared! Life is too short not to have a good laugh at others’ expense! Especially when laxatives and seaguls mix!

Dont feel too bad about the child, its part-payment for keeping his parents up at night 🙂

What has been seen cannot be unseen.