NB100 slow with Ubuntu 12.10

Without spending much time trying to diagnose the NB100 – IE Base install and connecting to the wireless, the speed does not exactly make the very honest Toshiba NB100 netbook usable. This is also assuming the tiny dual Atom, 1Gb of ram and the 120Gb non-ssd disk.

Reading across some of the forums, the issue is traced back to Unity and the simple fact that Canonical has opted to dump more processing onto the GPU rather than the CPU. This all falls back to their OpenGL and GLSL.

Without getting into details, it is worth noting that Google searches for “Ubuntu OpenGL slow” and “Ubuntu GLSL slow” bring up A LOT of results.
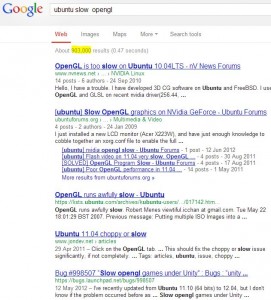
Appendices – Google results.

Documented workarounds are downgrading to older versions. 10.04 which is reasonably quick (pretty quick even as a VM), going to alternative distros with slightly lighter footprints – IE Lubuntu, Xubuntu, and Lubuntu if you would like to to stay with the ‘Buntu family.

What has worked for me is to jump to Linux Mint Mate 14 – acknowledging that yes is it another apple from the same tree but this one was fallen a bit further and after a week of use seems more intuitive, better on resources, and could possibly even pass as an operating system you would install on your mom’s computer.

Recent development:

Further development from Canonical, the 13.10 release is meant to have a better polished Unity capable of providing a more fluid front end, loading time, etc. As yet this can not yet been benchmarked on the trusty old NB100 –

http://www.omgubuntu.co.uk/2013/06/ubuntu-13-10-readies-arrival-of-smarter-unity-dash

Where to find drivers

So this is one that has been coming up since the beginning of time.

How do you find out what a piece of hardware is without taking your computer case apart or if you dont have physical access to your machine.

My current platform is Windows 7 but it will be very similar in the likes of server 2008, server 2003, XP, and Vista.

On pc, better said Windows boxes, go to your start, all programs, accessories, system tools, and “system information”.

Drill down to components, and problem devices.

You will note something similar to the following:

From here we now know the “VEN”/Vendor, and “DEV”/Device. So, VEN = 11AB, DEV = 4364

Your next stop is http://www.pcidatabase.com/

Looking at out previous step, this is what was entered in the search:

And the results show the actual hardware:

Done – now you do not need to spend hours searching through 101 contradicting forums.


Thanks for reading.

Galaxy 551

You have just purchased the samsung i 5510 – the standard Android version is comes with is 2.2.

The firmware upgrade will be one of your first goals.

Note that searching google will show a lot of options as far as the flashing goes, all with the same issues; the keypad on the unit has buttons that do not correspond with the physical keys.

There were two variants of problems I discovered. First, the “A” and “Y” keys were reversed between themselves, second was the question mark key being mixed with a Armenian A (small 0 on top).

That said, after trialing with about 6-7 different Android releases I have found a Polish version that works.

Lets begin with the flashing:

  1. Download your firmware from here.
  2. Download your flashing program (Odin Multi Downloader) from here.
  3. Copy and paste the following into a text file, then rename to CALLISTO_v1.0.ops :
    0,mibib
    1,qcsbl
    2,oemsbl
    3,amss
    4,arm11boot
    5,boot
    6,recovery
    7,system
    8,data
    9,csc
    10,
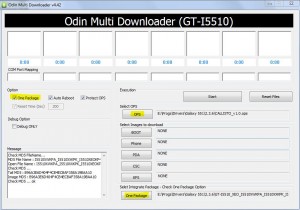
  4. Prep your Odin. You will need to point it to your new OPS file (CALLISTO_c1.0.ops), tick the “One package” and lastly to point it to your downloaded firmware (from step 1). The end result will look as such:
  5. Next, your phone will need to be put into download mode. This can be done by switching it off then holding down the power button + Q key.
    If sussessful Odin will recognize the com port mapping and mark with yellow highlighting:
  6. You are now ready to begin, press “Start”
  7. Upon completion, the phone will reboot itself. Now we need stock factory condition *remember to do your backup first!*. The way we bring it to factory condition is to start it in recovery mode by using the same procedure as with download more except this time we hold down Power + T. You will “wipe data/factory restore” and “Wipe Cache Partition” with a combination of the ALT and Middle Enter Button. Once complete reboot the phone.

Voila, you now have a samsung i 5510 running Gingerbread 2.3.6.

Other things you may want to know about this phone is that is has recently been taken off the shelves by Samsung so we should not expect further updates; at least not from them.

I have also found the battery to last about 2-3 days depending on use; which is great. You will also find all the new garnish to be to your liking.

This was tried and tested with the 2DegreesMobile carrier in New Zealand and the samsung i 5510 / 551 mobile.

pptp vpn

So you’re out and about and require connectivity back home or SOHO. Here is your pptp vpn solution, for free

An elegant solution has been around for the DDWRT, the distro specialising on your Linksys 54GL routers. I initially found this to not be so well documented.

This will essentially turn your 54gl box into a pptp vpn gateway in 5 steps. These boxes are smart in the sense that you can bind multiple to a client-server level but for the time being we’ll look at giving you access from an internet bound PC or your smart phone. I will put further information up showing you how to go about setting up your computer, smartphone, or tablet.

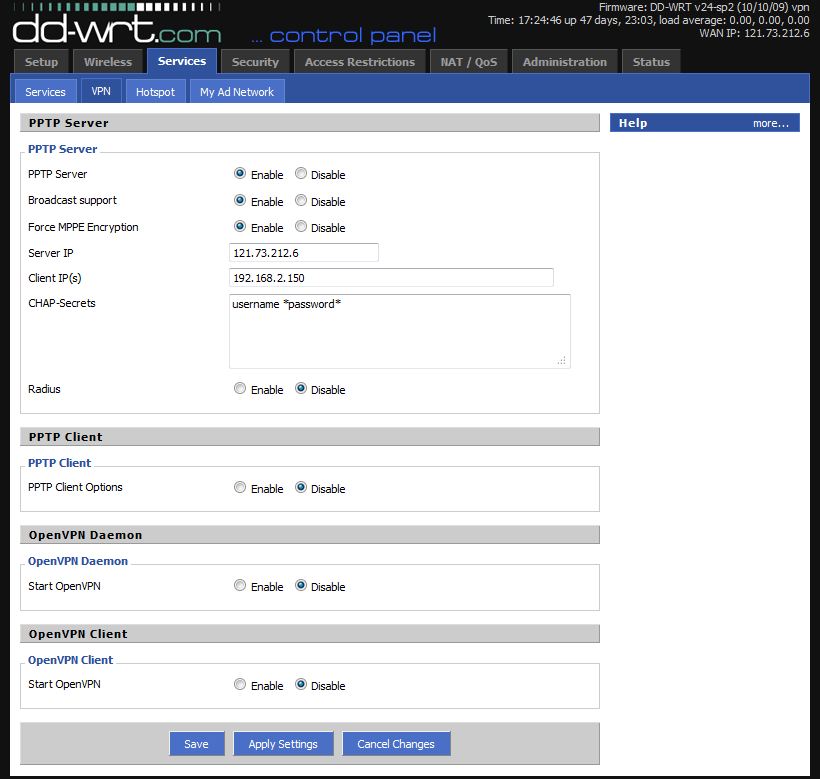
For the time being, what we are interested in enabling is the PPTP VPN Server.

Secondly  – “Force  MPPE Encrytion” – this will force your connecting client machines to use encryption.

Note: Forcing MPPE encryption is by no means public or private key encryption so if the attacker is smart enough they will still be able to play a man-in-the-middle role in a attack.

Server IP – this will be your external facing IP address/your internet address.

Client IP(s) – here you can use a single IP or a DHCP range.  For example for example 192.168.2.150,192.168.2.150-155.

CHAP Secrets – this will be your usernames and passwords that are allowed to VPN  into your netwrok – the format follows:
username *password* IE – joeblogs *password123*

Last note: the subnet you are connecting from will need to be different to the destination. IE You cannot connect from private 192.168.y.0 to 192.168.y.0 but you can 192.168.1.0 to 192.168.0.0

For the upcoming blog I will be looking at setting up your client end on Windows 7 and Android phone. Pretty neat solution if you’re needing a pptp vpn server setup in 5 minutes.

pptp vpn - ddwrt